When erosion threatens a slope, streambank, or disturbed site, the goal is not just to stop soil loss. It is to create a system that stabilizes, regenerates, and improves over time. Bioengineering materials do exactly that by combining natural structures with living vegetation to deliver both immediate protection and long-term resilience.
To begin, it is important to understand how these systems work from the ground up.
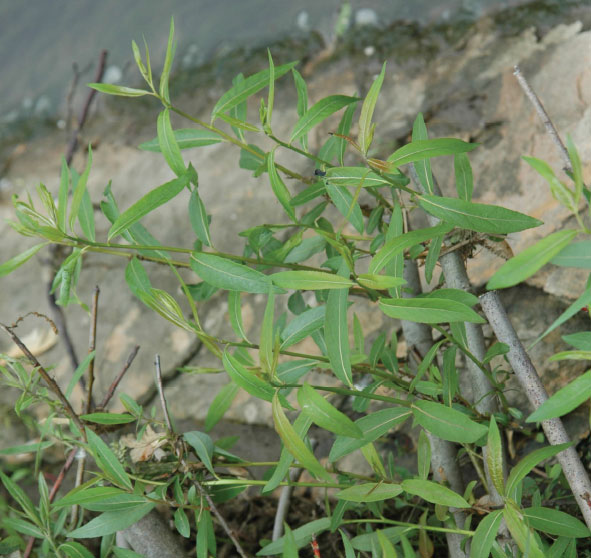
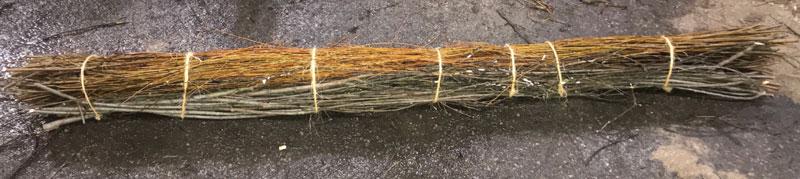
Live stakes installed and sprouting new growth
What Are Bioengineering Materials and How Do They Work?
At their core, bioengineering materials perform two jobs at once. They help hold soil in place during vulnerable periods, while supporting vegetation establishment so root systems can eventually provide long-term stabilization
How the process works in practice:
You install the material to protect exposed soil from wind and water erosion
The material reduces runoff velocity and retains moisture at the soil surface
This transition from material-based stabilization to vegetation-based stabilization is what makes bioengineering approaches effective. In practical terms, you are initiating a system where materials support plants, and plants eventually do the heavy lifting.
What Types of Bioengineering Materials Are Used for Erosion Control?
You have several types of bioengineering materials to choose from, and each is designed for specific site conditions, timelines, and performance needs. The right choice depends on how much stress your site will face and how quickly you expect vegetation to establish.
Below are the most commonly used categories.
Live Stakes
Brush (Branch) Layers
Brush Mattresses
Wattles / Fascines
Dead Wedge Stakes
Live Whips
Live Stakes
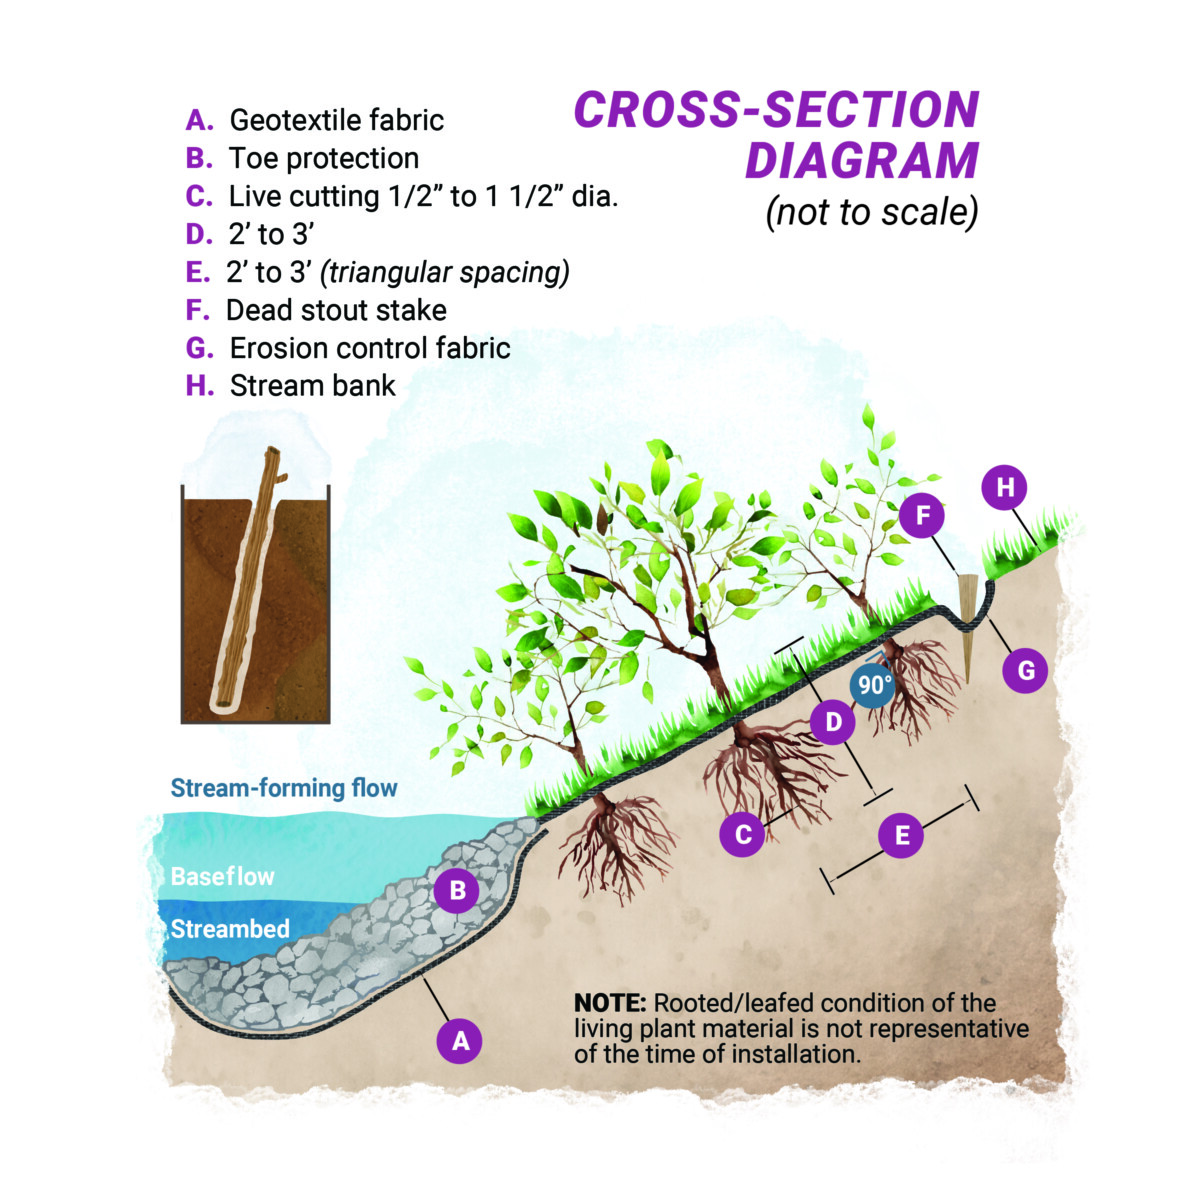
Live stakes are dormant woody cuttings driven directly into the soil. Once established, they root and form a dense network that binds soil together.
Best for: Slopes, streambanks, and anchoring other materials
Key benefit: Creates a reinforcing root mat that stabilizes soil over time
Installation notes: Install stakes during their dormancy (late fall to early spring). Do not allow the material to dry out. Soaking before planting significantly increases survival and growth rate. Drive a pilot hole into firm soil and plant at right angles (buds oriented up) with at least two-thirds of its length underground. Plant stakes randomly or 3′-6′ apart on triangular spacing. Tamp the soil down around the cuttings before watering. Irrigation may be necessary if a long dry spell or hot weather is expected following installation.
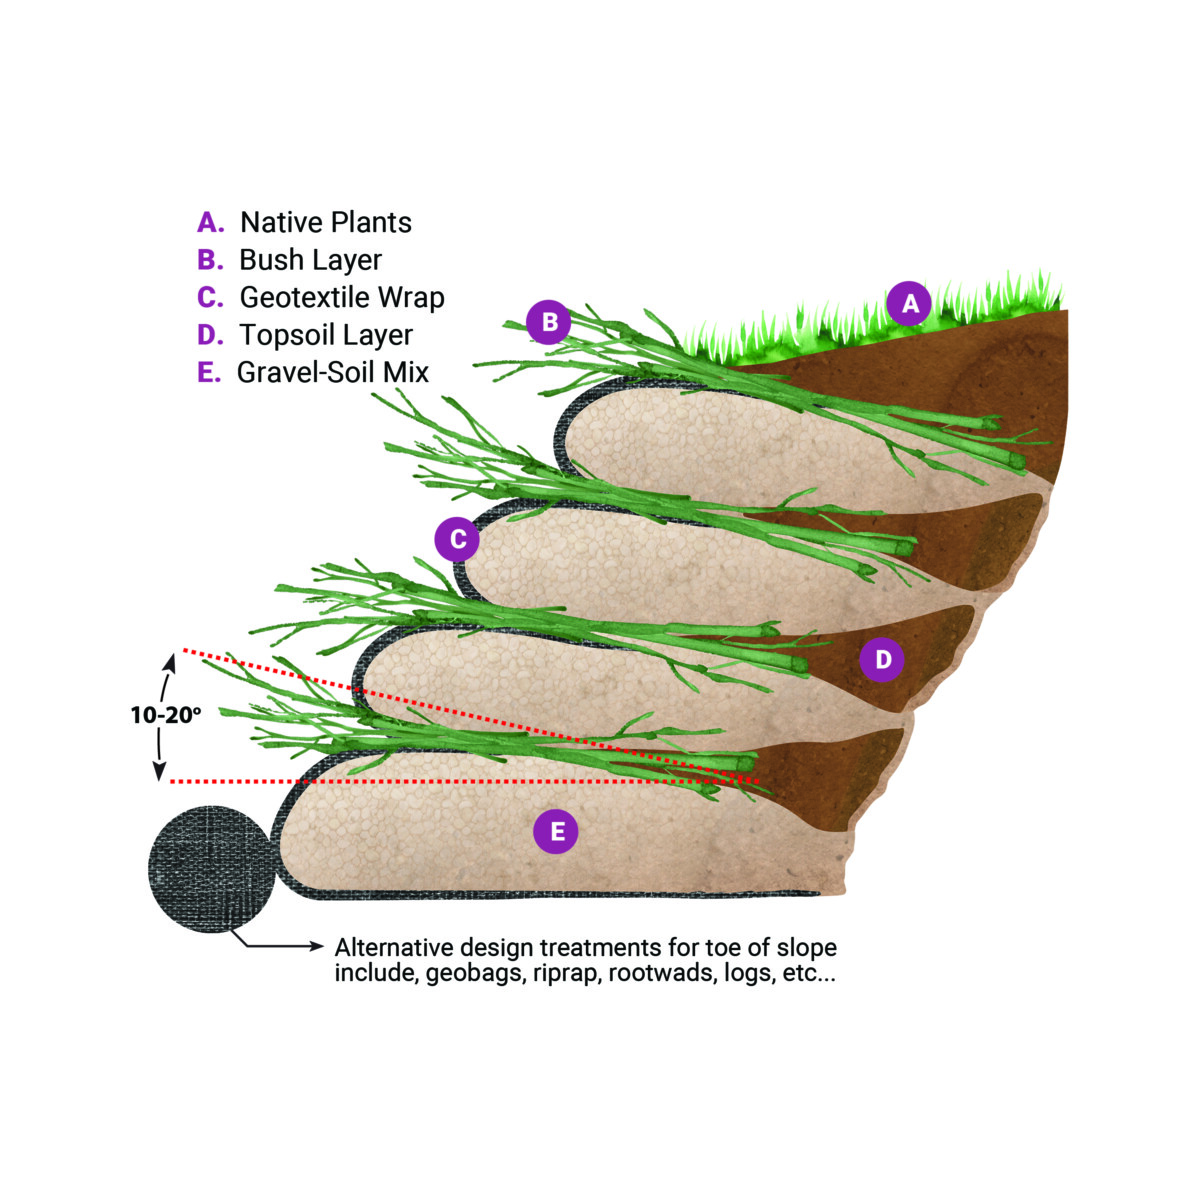
Brush (Branch) Layers
These are layers of live branches placed along contours and covered with soil, typically used to repair slopes or gullies.
Best for: Filling and stabilizing slumped or eroded areas
Key benefit: Increases soil strength and supports revegetation
Installation notes: Install brush (branch) layers during dormancy (late fall through early spring) using fresh, viable cuttings. Excavate a shallow trench along the slope contour, stepping the slope if needed to create stable benches. Place branches with the butt ends oriented into the slope and tips facing outward, ensuring good contact with the soil. Partially backfill each layer with compacted soil before installing the next lift, leaving some branch tips exposed to encourage sprouting. Space layers vertically based on slope steepness, typically every 2–5 feet. Keep all plant material moist during installation, and water thoroughly after backfilling. Monitor moisture levels during establishment, especially during dry periods.
Brush Mattresses
A crisscrossed layer of live branches is placed across a slope to form a continuous protective cover.
Best for: Streambanks and exposed slopes
Key benefit: Provides immediate surface protection while rooting across the entire slope face
Installation notes: Place material with the basal ends located toward the bottom of the slope. Using 3′ square spacing, drive dead wedge stakes into the plant material. Stretch wire or biodegradable twine or rope diagonally around the dead stakes and finish driving the stakes in to tighten the wire, twine, or rope and secure the mattress. Place a thin layer of soil over the entire area to encourage rooting. Irrigation is necessary immediately following installation.
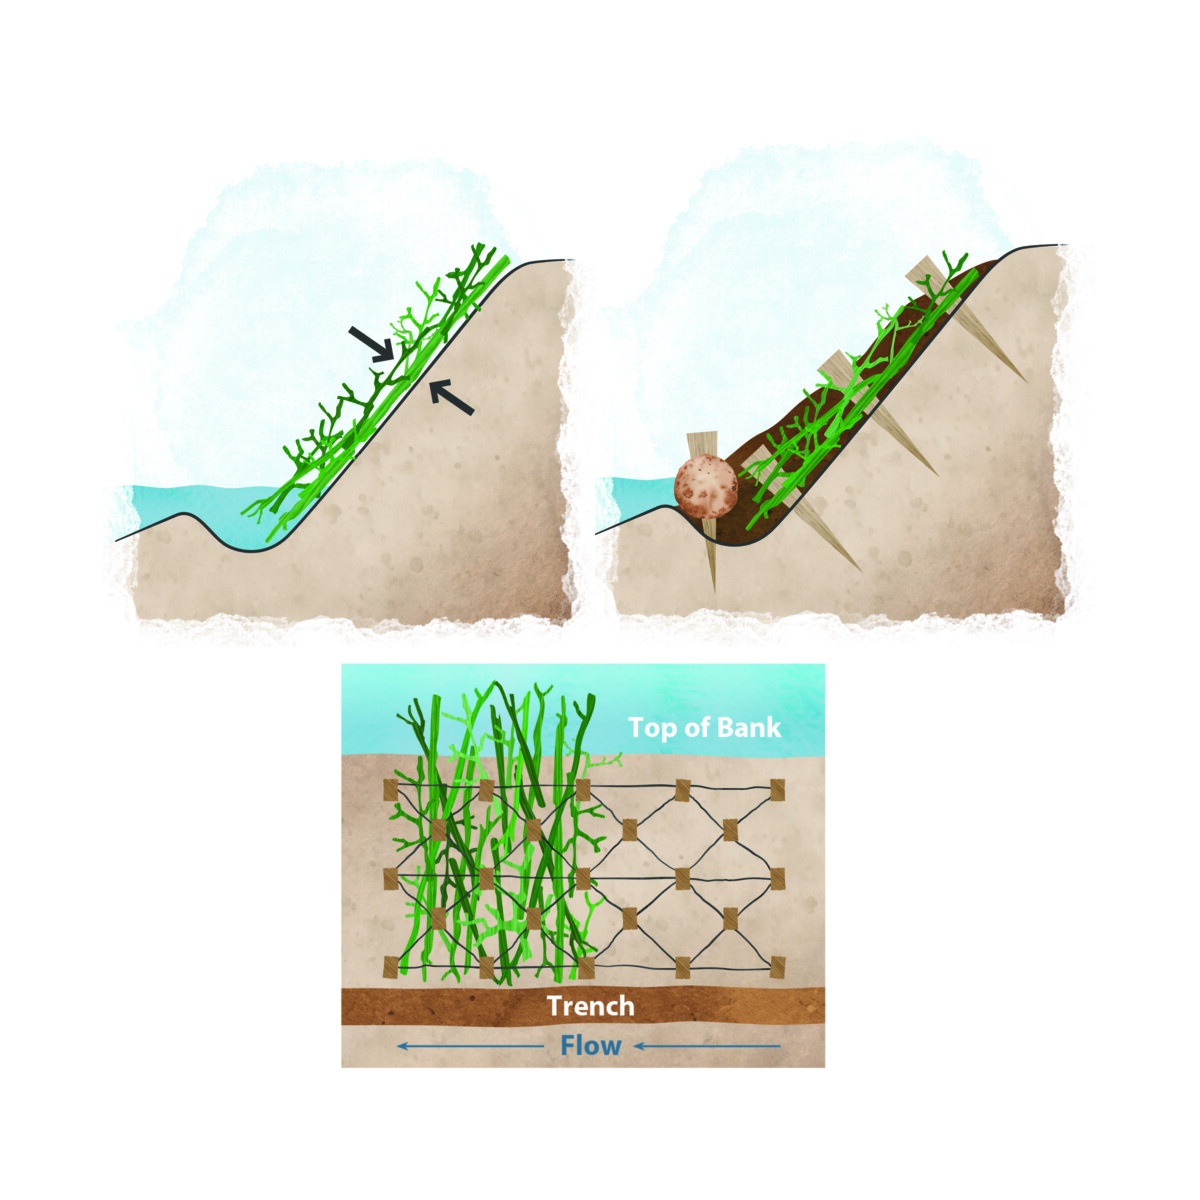
Wattles / Fascines
Bundles of live branches are installed in shallow trenches along the contour of a slope.
Key benefit: Slows water, traps sediment, and forms a living barrier once rooted
Installation notes: This technique is simple, effective, and installed with little site disturbance. Material is placed in 6″ wide trenches on banks or slopes parallel to the stream contour and partially covered with soil. Wedge-like dead stakes secure them in place at 2′-3′ intervals. Live stakes may also be used in conjunction with dead stakes to secure the material. Straw mulching the site following installation retains moisture and reduces surface erosion. Irrigation is necessary after installation if the soil is dry.
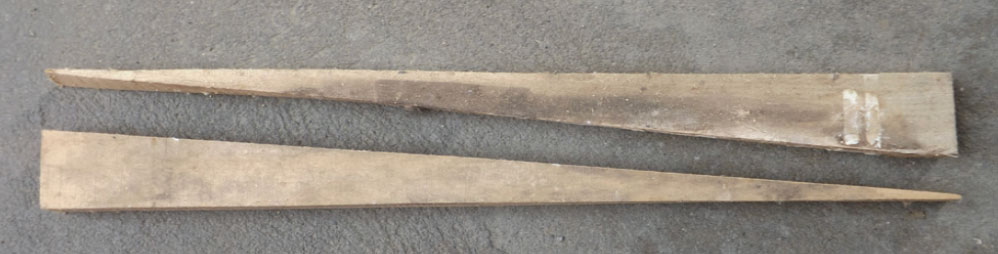
Dead Wedge Stakes
Hardwood stakes used to secure other bioengineering materials in place.
Best for: Anchoring wattles, brush mattresses, and similar systems
Key benefit: Provides structural stability during establishment
Stake sizes
1-1/4″ x 3-1/4″ x 2-1/2′ long.
Live Whips
Long, flexible live cuttings are suited for moist environments and integration with hard structures.
Key benefit: Extends rooting into deeper or protected soil zones
Installation notes: Push whips into the ground as far as they will go without breaking. At least two-thirds of the whip should be covered with soil. Whips may be installed either by laying them on an angle or planting them erect in the soil. When using whips with hard structures, be sure they are long enough to reach into the soil and moisture behind or below the structure. (Example: If installing whips through riprap, consider the 3′ depth; therefore, install a 6′ whip at least 2′ into the moist soil behind the stone and 1′ above the surface of the riprap).
How Do You Choose the Right Bioengineering Materials for Your Site?
Choosing the right bioengineering materials comes down to matching the product to your site conditions. If you get this step right, you set up both your materials and your vegetation for long-term success.
Start by evaluating the physical characteristics of your site.
Key factors to assess:
Slope steepness
Gentle slopes may respond well to live stakes or brush layering, while steeper slopes often require more structured approaches like brush mattresses.
Water flow and runoff
Areas with active runoff or stream influence may benefit from wattles (fascines) to slow water and capture sediment.
Soil stability
Loose or highly erodible soils typically need layered or anchored systems to prevent movement during establishment
Project duration
Temporary stabilization vs. permanent reinforcement.
Vegetation goals
Fast-establishing cover vs. diverse, long-term native plantings.
You should also think in systems, not products. Bioengineering materials perform best when paired with the right seed mix and site prep strategy. Selecting materials based on site hydraulics and soil conditions significantly improves establishment success and reduces failure risk.
In practice, your goal is simple. Match the material to the stress level of the site, then support it with vegetation that can take over.
Using Bioengineering Materials for Sustainable Erosion Control
Bioengineering materials offer a proven way to stabilize soil while building toward a stronger, more self-sustaining landscape. When you select the right techniques and install them correctly, you are not just controlling erosion. You are establishing a living system that improves soil structure, supports vegetation, and adapts over time.
Success depends on alignment. Materials, site conditions, and plant selection all need to work together.
If you are planning a project, Ernst Conservation Seeds offers both the seed mixes and expert guidance needed to support successful bioengineering systems.
Bioengineering materials provide a natural, effective way to control erosion while supporting long-term vegetation and soil stability. This guide explains key techniques like live stakes, brush layers, and wattles, along with how to choose and install them based on site conditions. By combining structural materials with native plants, you can create resilient systems that strengthen over time.
Bioengineering Materials Inquiry
Please let us know about your bioengineering project and we will follow up with more information.
Bioengineering Materials FAQ
What are bioengineering materials used for?
Bioengineering materials are used to stabilize soil and control erosion while promoting vegetation growth. They provide immediate protection and long-term reinforcement through plant root systems.
When should bioengineering materials be installed?
Most bioengineering materials should be installed during plant dormancy, typically from late fall through early spring. This timing improves survival rates and establishment success.
Do bioengineering materials work without vegetation?
They provide short-term stabilization on their own, but long-term success depends on vegetation. Plant roots ultimately take over, providing lasting soil reinforcement.
DISCLAIMER: The information in this review of practices is the result of more than 50 years of experience in seed production. Ernst Conservation Seeds has been supplying seeds and consulting in the reseeding of tens of thousands of acres of roadsides, surface mined lands, conservation, and restoration sites in eastern North America, as well as growing and supplying seed and consulting in the planting of hundreds of thousands of acres of CRP/CREP-related areas for erosion control and wildlife habitat. All of these practices are opinion only and our best advice as a result of these experiences. These recommendations do not cover all the conditions that will be encountered in the field. All of the information is for individual consideration. Ernst Conservation Seeds is not responsible for conditions that will be encountered in individual situations. The use of brand names does not represent our endorsement of a specific product; rather, it represents our experience only and has not necessarily been replicated in peer-reviewed research. The use of chemical pest control agents is subject to manufacturers’ instructions and labeling, as well as federal, state, and local regulations.